How to create an adorable door hanger for spring
I purchased this cute wooden Mason Jar from Hobby Lobby and I immediately knew that I wanted to make it into a door hanger for Spring.
So I gathered my supplies:
Wooden Mason Jar
Painter’s Tape or Washi Tape
Aluminum Sheet Pan from Dollar Tree
Paint colors of your choice
Stencil & Stencil Brush
Mod Podge or Fixative Spray
Spring flowers
Coordinating Ribbons
The first thing that I did was to paint the mason jar with two coats of white acrylic paint.
After letting it dry, I wanted to paint a buffalo plaid pattern onto my mason jar. I had seen this technique done before and I was anxious to try it myself.
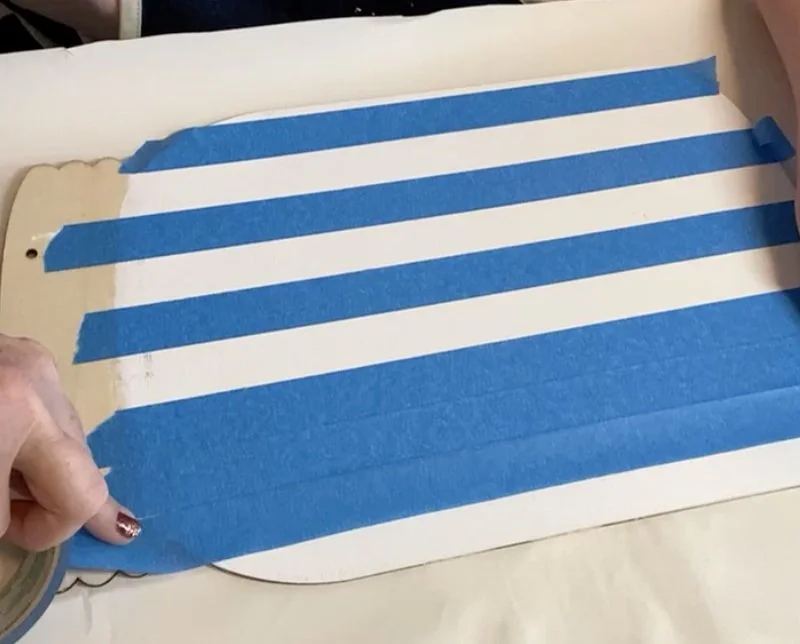


You can use either 1” painter’s tape or washi tape. You start with placing one strip of tape on your mason jar (either direction…it really doesn’t matter). Next, add a strip of tape on either side of the first strip. Be sure and press the edges down really good for a crisp line when you remove the tape. You will remove the middle strip of tape and use this piece for a spacer. Continue adding tape until the whole thing is covered. Also, make sure that your stripes are straight!
Now you are ready to paint your first set of strips! Be sure and water down your paint so that it looks almost like watercolor painting. You don’t have to be perfect.
Let this coat of paint dry before going to the next step.
Remove the tape and do the same process as above in the opposite direction. This time when you paint the stripes you can dilute the paint just a little but not much. Once again, allow this to dry and it’s time for the big reveal!!! I just love this part!


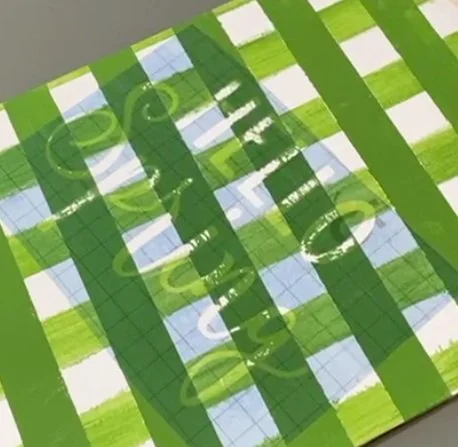
I wanted to add the words “Hello Spring” and so I used Cricut Stencil Vinyl. I must admit that this worked out really well and it’s not as sticky as regular vinyl but it did leave a crisp edge when I removed the stencil.
I do suggest that you add a layer of mod podge or Spray Sealer before applying the stencil. This will help prevent paint lifting up when you remove the stencil.
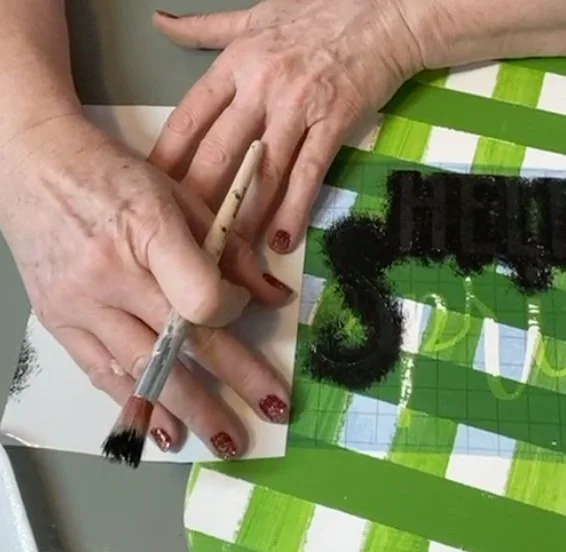
Here is instruction on how to use your stencil brush.
Load your stencil brush with paint
Pounce it onto your palette to get most of the paint off the brush
Pounce the paint onto the stencil with an up and down motion (do not try to paint like you are using a paintbrush)
If your stencil is cut close to the edge and you don’t want to get paint on the mason jar (where you don’t want it to be) either lay down a piece of paper or add painters tape/washi tape. This is demonstrated in the middle picture below.
You will probably need 2 - 3 coats of paint (you want to go with a lighter coat each time to prevent the paint from going under the stencil)
Allow the paint to dry and remove the stencil

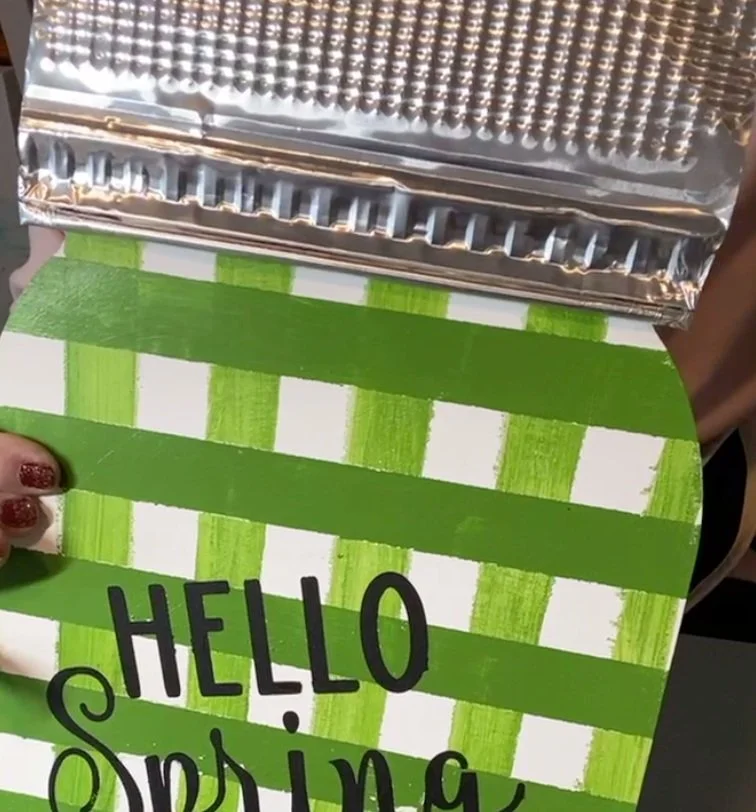
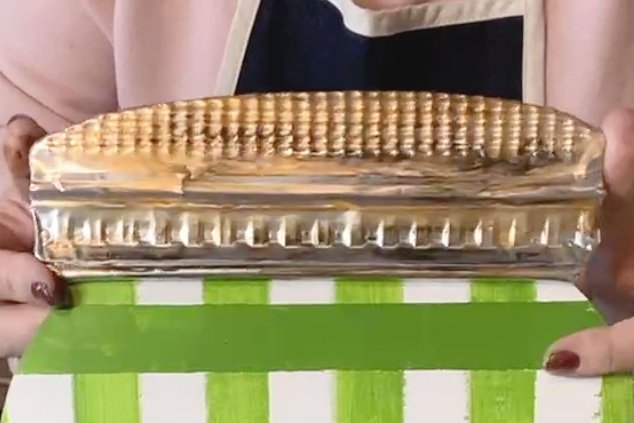
For the lid of my mason jar, I used an aluminum sheet pan from Dollar Tree. I wanted to use the lip of the pan as the bottom part of the lid so that it had a ridge like a real mason jar. The best way to cut the sheet pan is to use Kitchen Shears from Dollar Tree because this way, you aren’t ruining your good scissors. Be very careful because the aluminum, once cut, can be very sharp.
After I had the shape that I wanted, I hot glued the lid to my mason jar. Please be careful because the hot glue does make the aluminum very hot! After it was glued down, I simply trimmed around the edges.
To make the lid look a little aged instead of shiny new, I added a dab of brown and black paint…justing rubbing it on with my fingers so that I had better control.

Now it’s time to add your spring flowers. Most of my flowers I purchased from Dollar Tree last year. I started with the ivy as my base and then just began to add my flowers, arranging them the way that I wanted. You can add as many or as few flowers/greenery as you want. This is your creation!
The last thing that I did was to make a Junk Bow from about 5-6 coordinating ribbons. For the Junk Bow all you need to do is cut your ribbon about 8” long. You can use as many layers and styles that you want. Place a piece of twine, small ribbon or zip-tie on the table. Begin layering your ribbons (face down) in an “X” pattern. When you have the bow you want, scrunch it in the middle and tie it together. Trim the edges and fluff the bow.
I also added a piece of ribbon to the center of my bow by simply folding the ribbon into thirds and gluing in the back of the bow before I hot glued it to the mason jar.
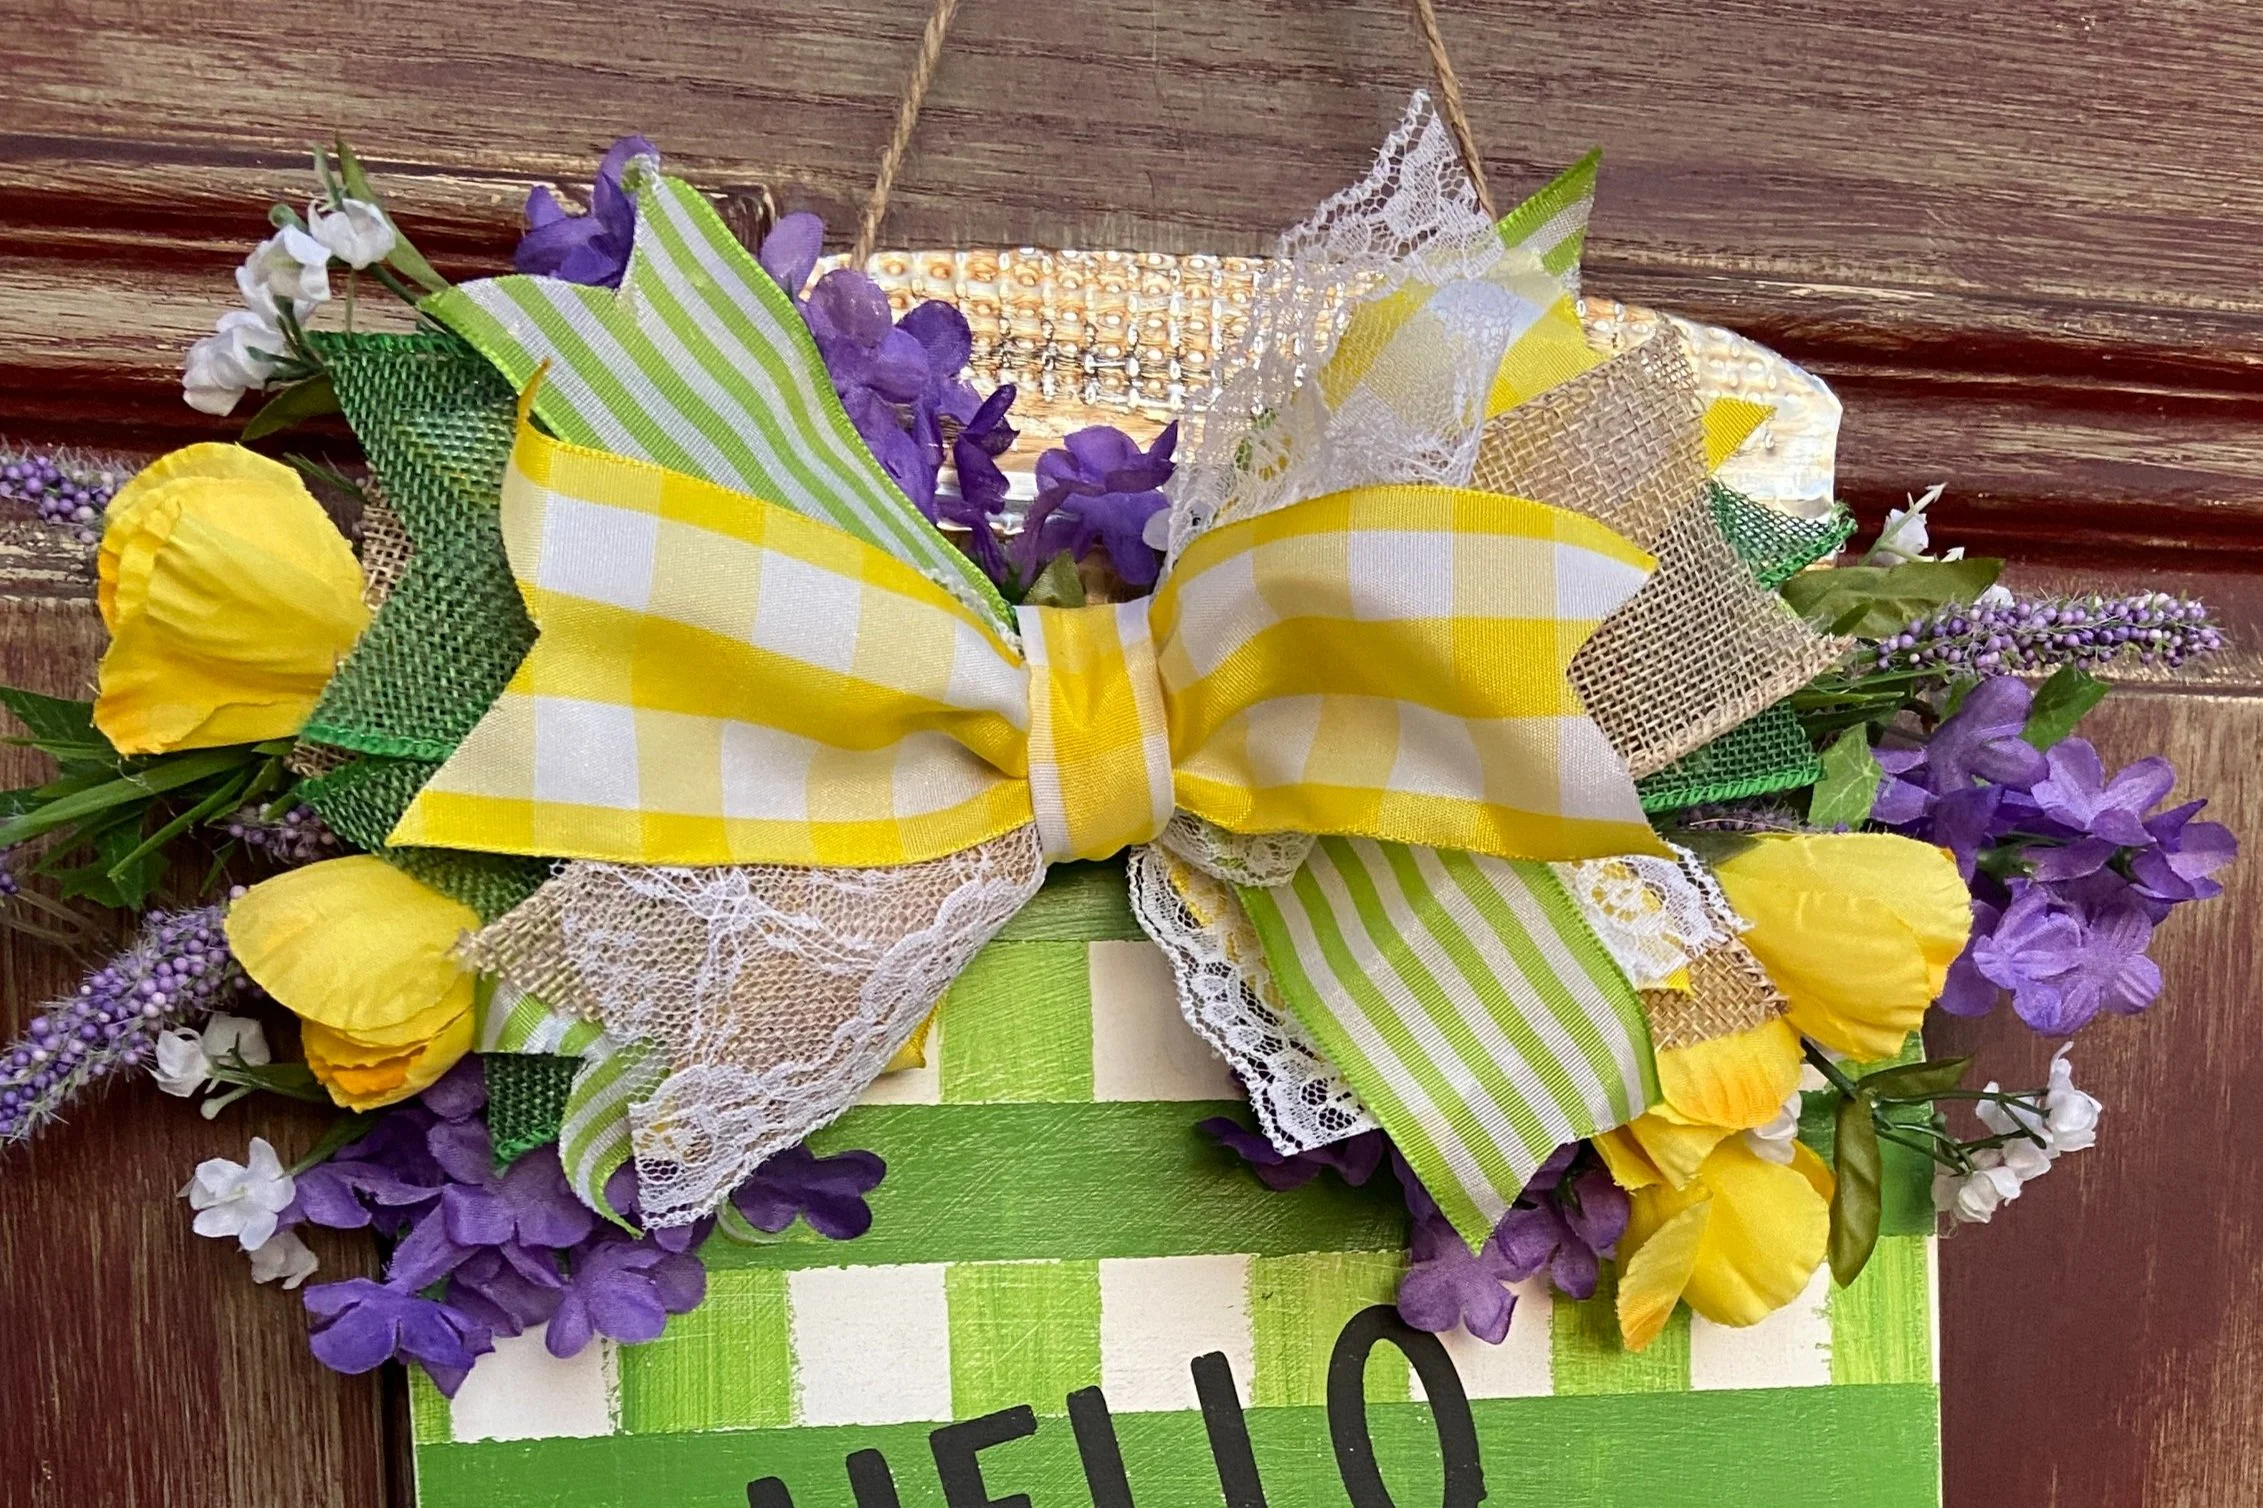
The last thing that I did was to punch holes through the aluminum pan. I then reattached the jute twine that came with the original mason jar. You could also use a wire hanger or a wood bead hanger.
I just love how this turned out and it looks great on my front door. It just adds that special pop of color and just makes me smile!