Create Your Own Notebook Portfolio with Just One Sheet of Scrapbook Paper


Do you ever find yourself needing a small notebook to jot down your grocery list, to do list or just random ideas or thoughts? Let me show you how to make a stylish and functional notebook portfolio using just one sheet of 12" x 12" scrapbook paper. I’ll also be adding a traveler's notebook in the middle for a complete and portable journaling folder.
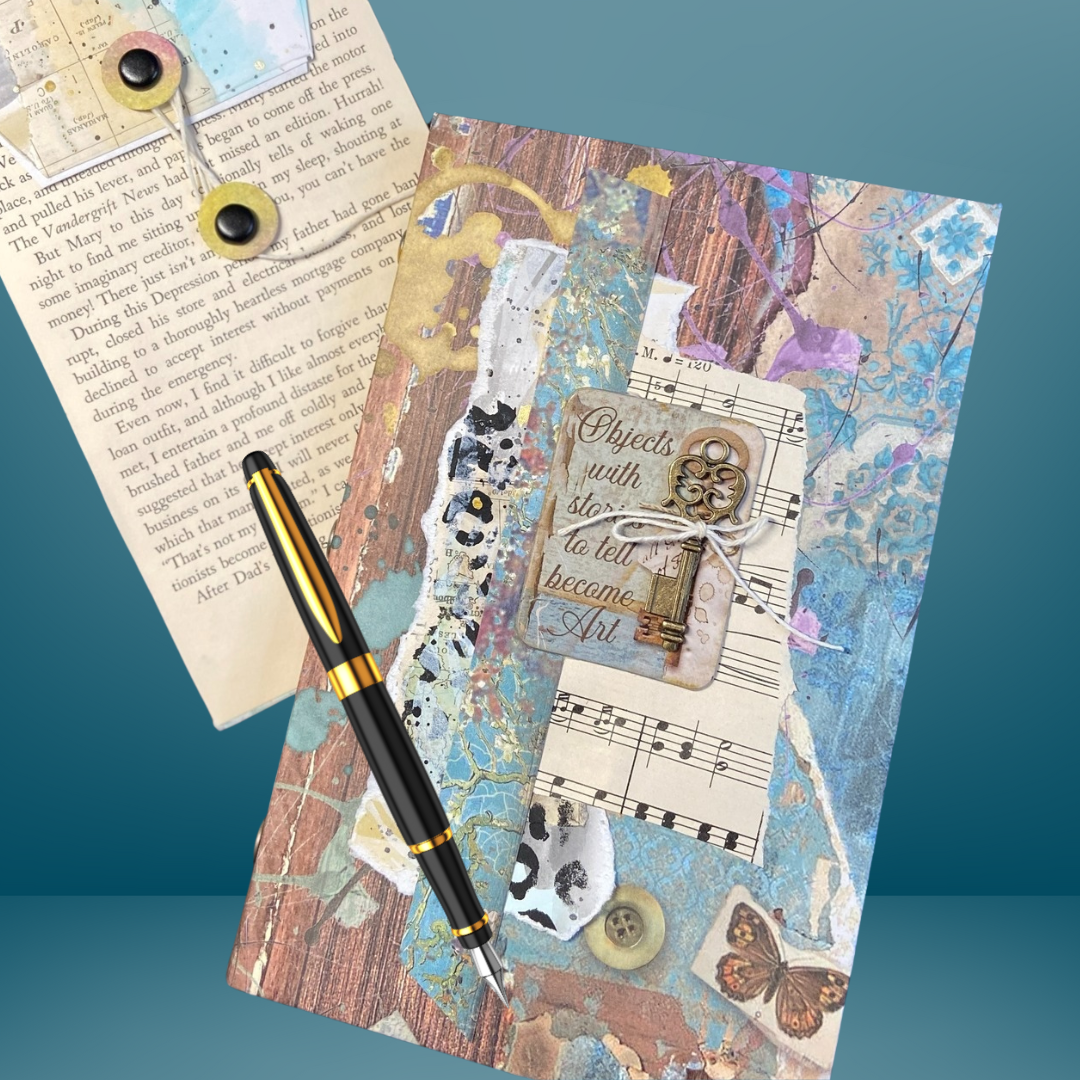
This small notebook makes a great and inexpensive craft item for you to make and sell.
Let’s get started!
MATERIALS NEEDED

One sheet of 12" x 12" scrapbook paper
8 ½” x 11” cardstock or copy paper to make the traveler’s notebook insert
A bone folder or scoring tool
A ruler
Glue
Awl
3 brads
Scoring Board
Elastic band or ribbon (optional)
Scissors or a craft knife
Decorative elements like stickers, washi tape, or stamps for embellishment (optional)
STEP 1: Download Template
I have included a template for you to use with scoring and cutting lines. The template is not to scale but does include measurements.
STEP 2: Scoring your Portfolio
Score the 12” x 12” scrapbooking paper 1/2” on both sides and the top (not the bottom because that’s for the pockets)
Score the bottom of the 12” x 12” scrapbooking paper to either 3” - 4” inches. This will determine the size of your pockets and your portfolio. I scored one at 4” and the second portfolio I score at 3 1/4”.
Find the center of your 12” x 12” scrapbooking paper and measure about 1/4” on either side and score all the way down the length of the 12” x 12” scrapbooking paper.


STEP 3: Cutting the bottom to create your pockets.
Measure an 1” from each score mark at the bottom. Draw a line from the score mark to the 1” mark and cut this section out.
Cut the folded sections off on the sides just inside of the score line so that the pocket can fold up nicely.
STEP 4: Trim the corners
Trim the edges of the top and bottom corners of the portfolio by cutting a triangle shape with a bit of a slant (not perfectly straight across).

STEP 5: Secure the sides of the pockets using double-sided tape or glue.

STEP 6: Creating a traveler’s notebook
Pick about 8 - 12 pieces of copy paper or cardstock (8 1/2” x 11”) and fold each in half creating a 5 1/2” x 8 1/2” sheet of folded paper.
Once you are happy with the layout, clip your pages together and use a Rotary Cutter to trim the edges for a smooth look. The size of the notebook will be determined by the size of your portfolio. I like to cut my notebook about 1/4” to 1/2” from the edges of the portfolio. (This step is optional but it does create a more professional look to your notebook).
STEP 7: Creating a template for the holes in the traveler’s notebook
Using a scrap piece of paper the same length as your notebook and about 2” - 3” inches wide, fold this sheet in half long ways.
Now fold up the bottom and top end towards the middle about 1”. (I never measure!)
Fold the template paper in half and make sure you have nice score lines.
Unfold the paper and make marks on the three folds in the center of the paper. This will be where you will punch your holes to add the notebook into the portfolio.


STEP 8: Adding the traveler’s notebook to the portfolio
Punch holes in the traveler’s notebook and the center of the spine on the portfolio.
To secure the traveler’s notebook, you can use 3 brads, a book binding stitch or an elastic band or ribbon. I like to use 3 brads because when my notebook is full, I can remove those pages and add new ones.
STEP 9: FINISHING TOUCHES
Now for the fun part—decorating! Add your own personal touch with stickers, washi tape, or stamps. You can also label the pockets or add a decorative closure to the portfolio with a button, ribbon or charm.
I hope that you will create this simple and stylish notebook portfolio made from just one sheet of scrapbook paper. It's perfect for journaling on the go or as a thoughtful handmade gift.


