Create Festive Wax Paper Christmas Trees
Looking to bring a touch of festive magic to your home this holiday season? Look no further! Let’s craft an exquisite wax paper Christmas trees that will add joy and cheer to every corner of your space. Get ready to unleash your inner artist and transform your home into a winter wonderland.

Gather Your Materials
To get started on creating your own festive wax paper Christmas trees, you'll need to gather a few materials. Don't worry, it's nothing too complicated - just a handful of items that you may already have lying around your home.
Supplies Needed:
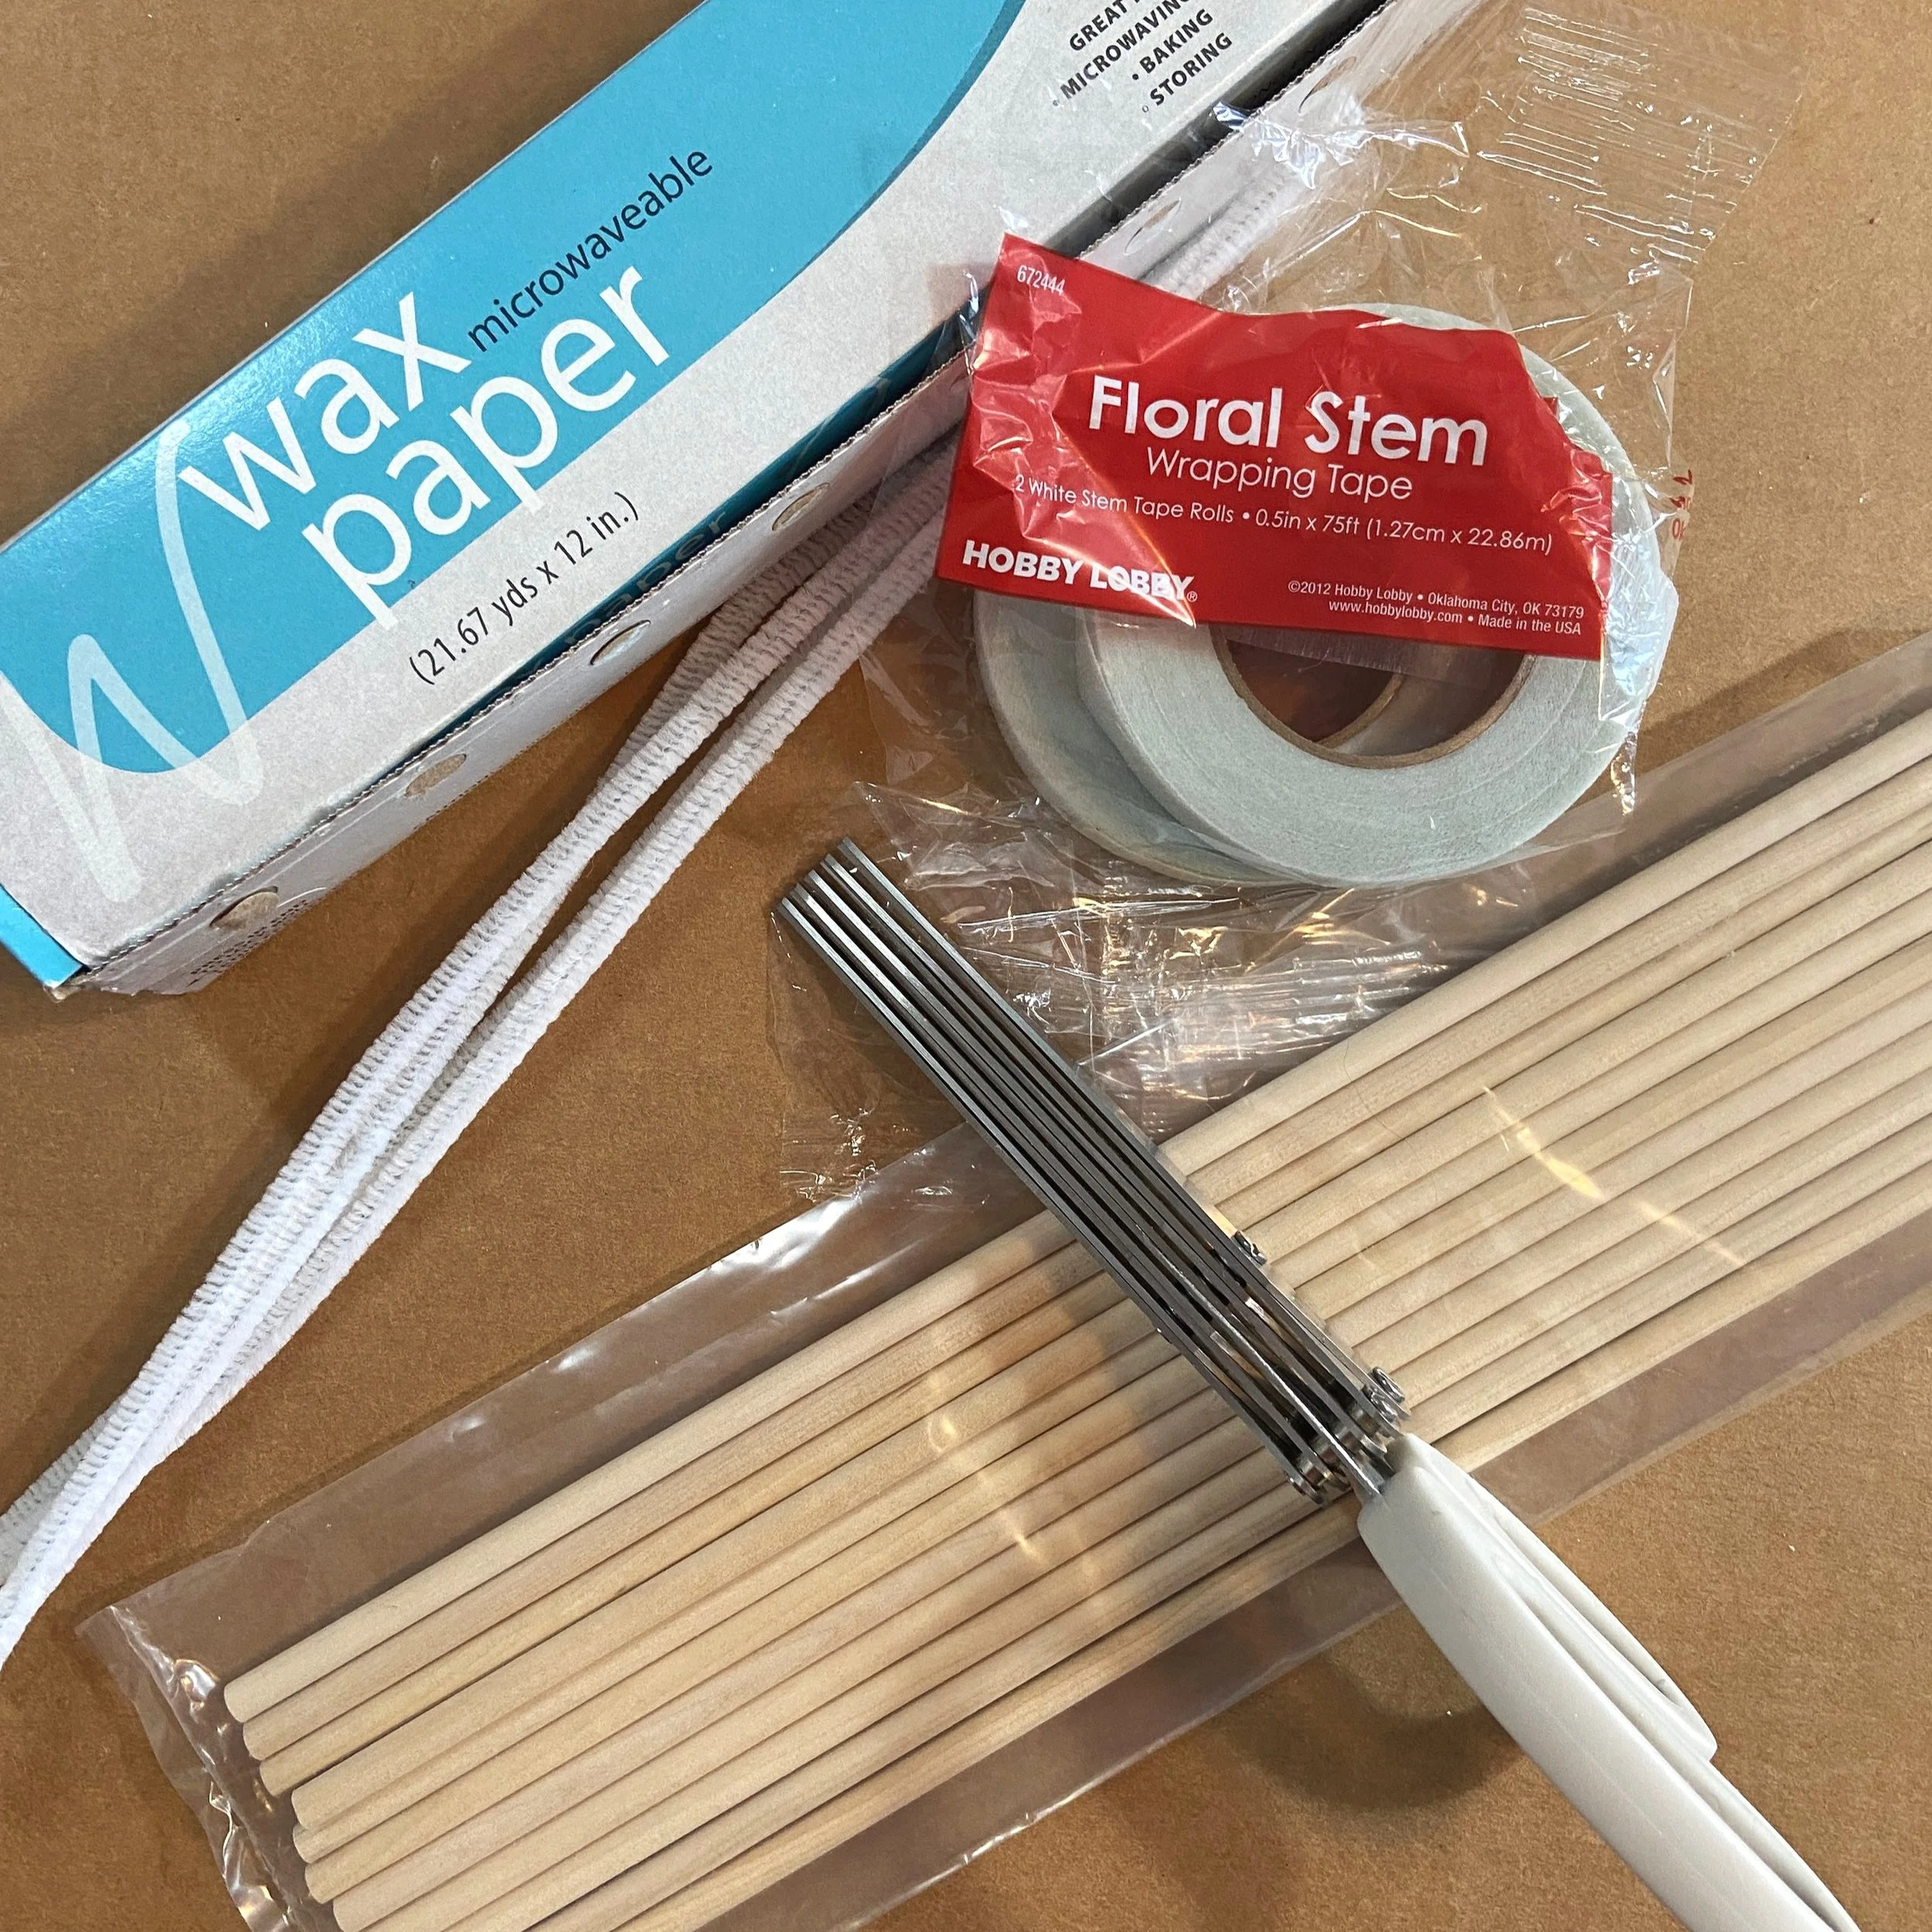
Wax Paper
Craft Glue
Pipe Cleaners (Chenille Stems)
Wire Cutters or Scissors
Dowel Rod
Container/Pot
Floral Foam
Floral Tape
This page contains affiliate links. If you choose to purchase after clicking a link, I may receive a commission at no extra cost to you.
Cut Your Chenille Branches:
Cut all your chenille strips (be sure and keep each size together)
Five 3” stems
Seven 3 ½” stems
Fifteen 4” stems
Fifteen 4 ½ stems
Cutting the Wax Paper
You will need at least 40-50 strips of 2 1/2 to 3” strips of wax paper. I used the front of the box as my template (approximately 2 ½”)
Folding and Cutting The Wax Paper
Fold the wax paper strips in half (long ways). Using the Herb Cutter Scissors, start cutting fringe (not the folded side).
Make sure to not cut through the fold of the wax paper but just right before the fold.
Creating The Wax Paper Tree Branches
Add a dab of craft glue to one end of the wax paper. Lay down a chenille stem and start rolling the wax paper around the stem in a spiral pattern.
After you have all your chenille stems covered, it’s time to put the tree together.
Assembling the Wax Paper Christmas Tree
Add white floral tape to the top of the dowel rod. You can cover the entire dowel rod but I found that this wasn’t necessary.
Using the white floral tape, start attaching the 3” stem to the very top of the dowel rod. After it’s secure, bend the stem so that it looks like it’s coming out of the dowel rod.
Add the stems around the dowel rod about ¼” to ½” apart from the stem above. Start with the small stems and end with the longer stems. Fill up the dowel rod with as many stems as you want. It just depends on how big and full you want your wax paper tree to be.
Final Touches
After you’ve completed your tree, add floral foam to the container of your choice. Add the Wax Paper Christmas Tree.
I added Epsom Salt to cover up my floral foam but you could definitely use moss or anything that will cover the foam.
I can just picture several of these trees on a fireplace mantle or making smaller ones and using them in a Christmas Village.


Creating festive wax paper Christmas trees is a delightful and easy craft that will add a touch of holiday magic to your home decor. By gathering your materials, cutting the wax paper, assembling the trees, and displaying them with care, you can unleash your creativity and make your home merry and bright. These charming trees will make a stunning addition to your holiday decor, bringing joy and cheer to any room. So, don't wait any longer, gather your supplies, follow the instructions, and let your imagination run wild. Make this holiday season extra special by creating your own wax paper Christmas trees.
