DIY Wooden Carrot Home Decor Frame
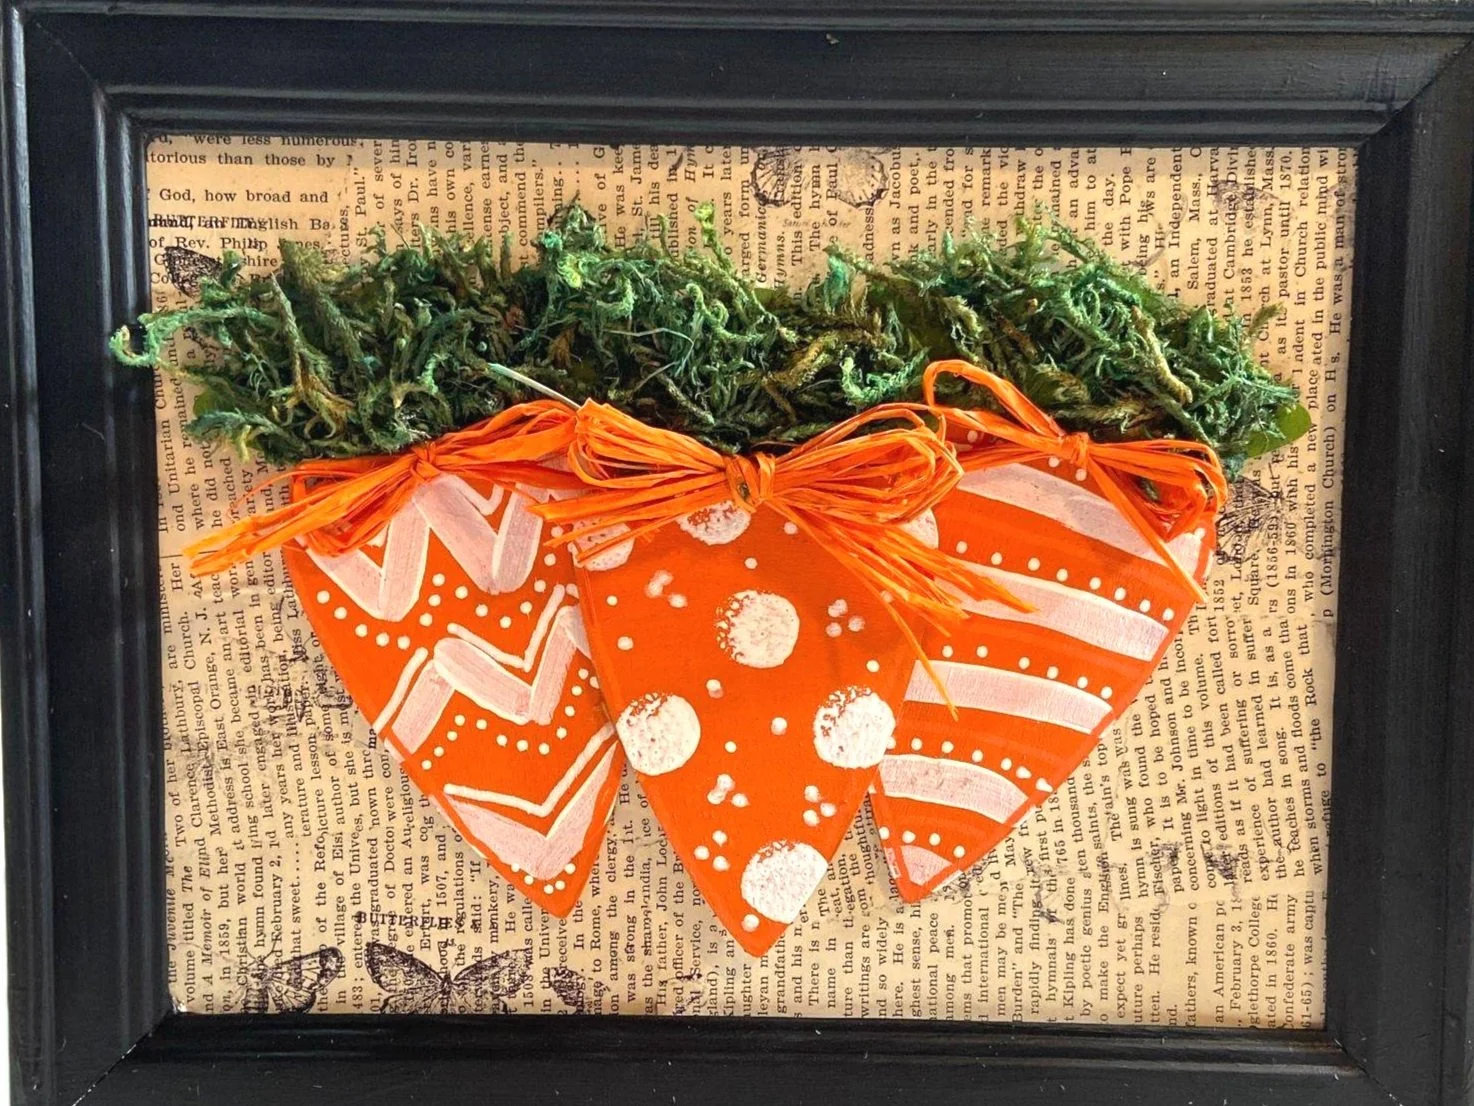
This is a quick and easy project that will add color and a touch of whimsy to your Spring Decor. With just a few simple supplies from Dollar Tree and acrylic paint, you can easily create a charming piece that will look great in any room.
Supplies Needed:
3 Wooden Carrots
1 6” x 9” Frame
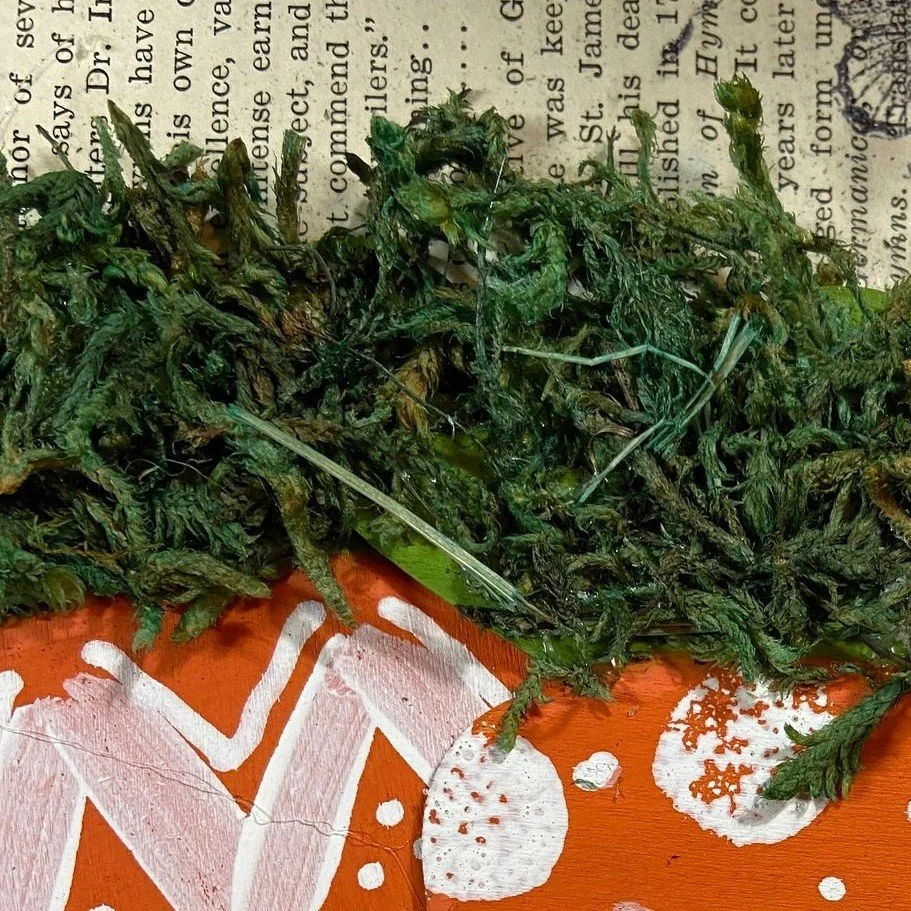
Green Moss
Acrylic Paint: Orange, Green and White
Book Paper
Mod Podge
Orange Raffia or Ribbon
Stamp of choice
Stamp Pad (color of choice)
Adhesive
Paint The Carrots:
Step One:
Paint the carrots orange and green. You may have to apply several coats. Allow the carrots to completely dry.


Step Two:
Let’s embellish the carrots.
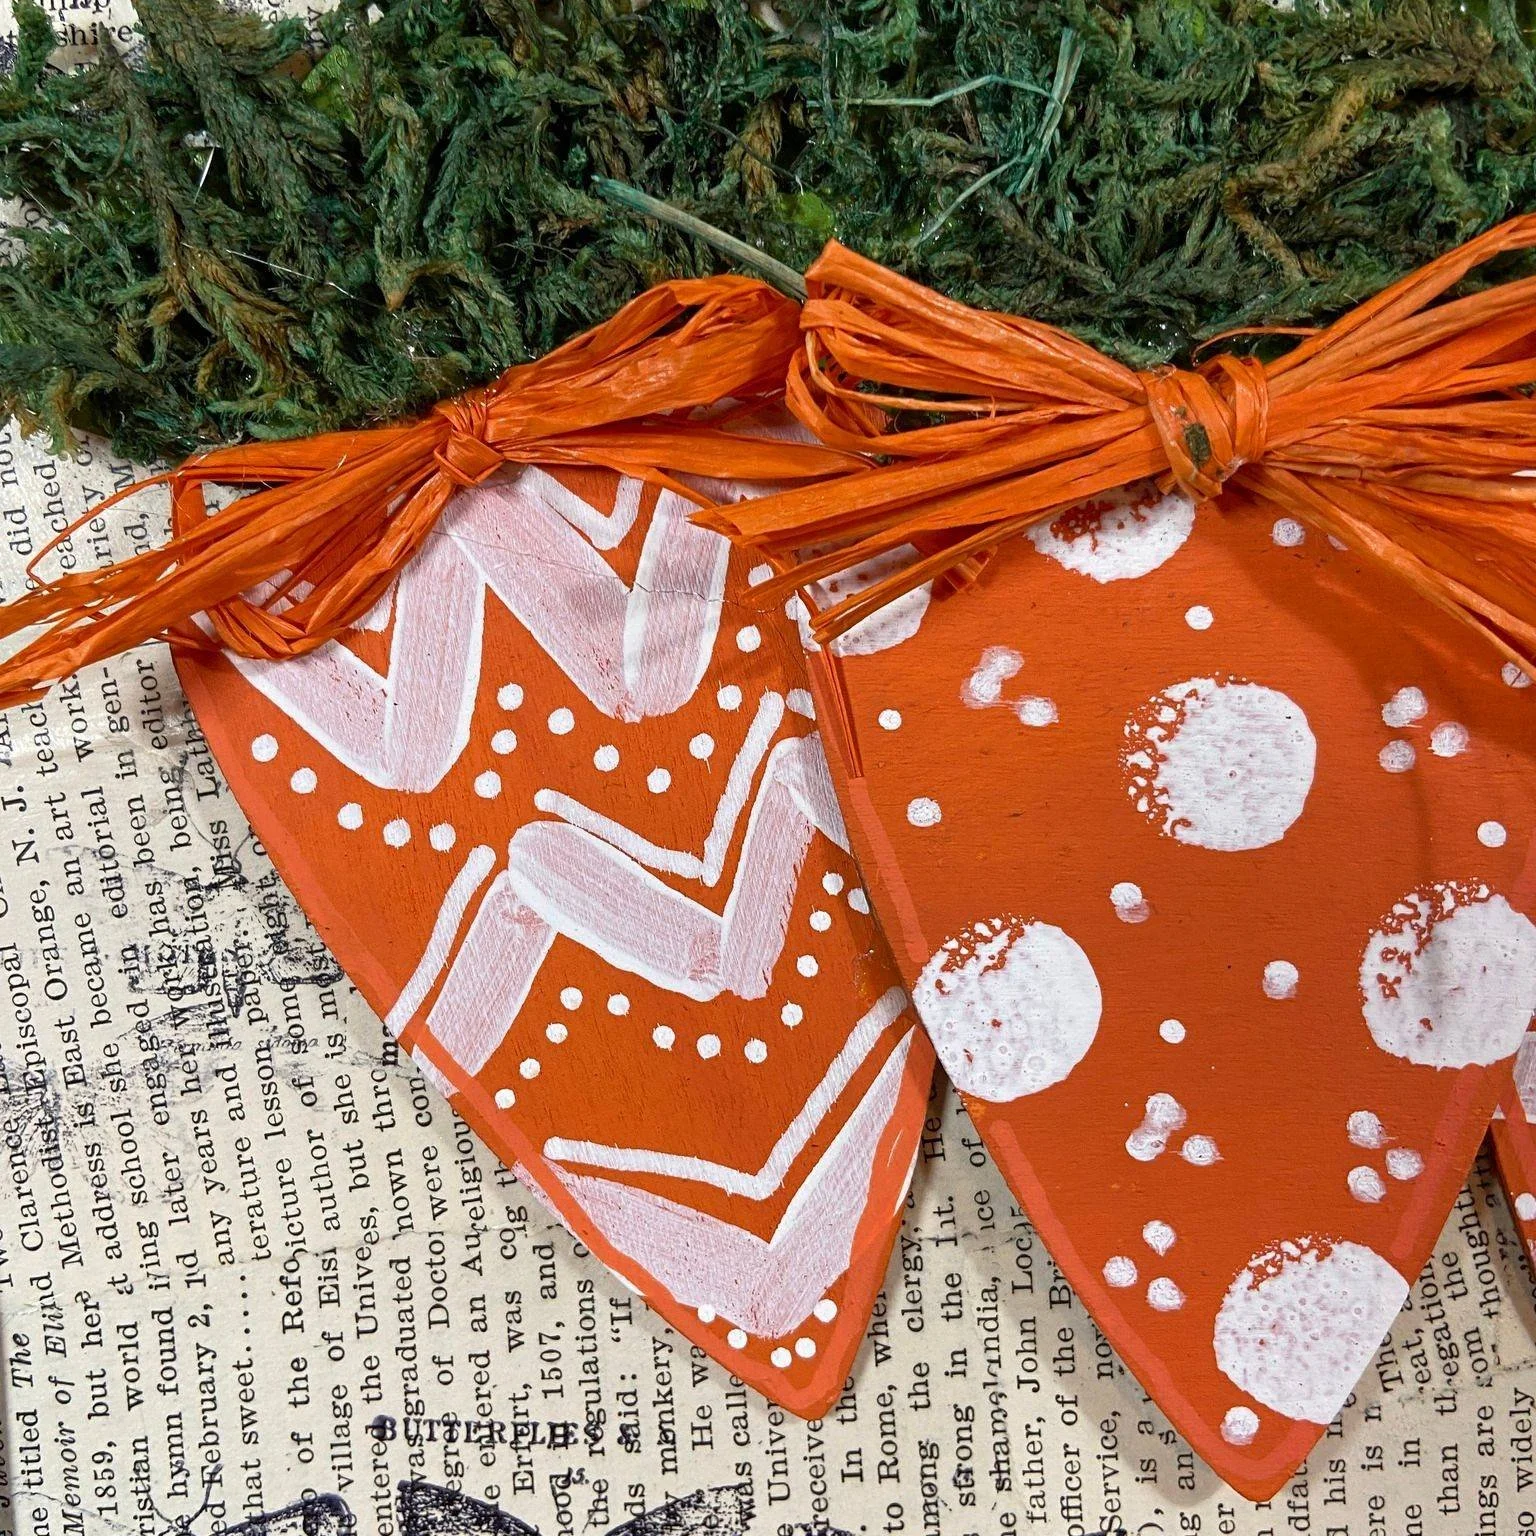
First Carrot: Paint stripes that follow the curve of the top of the carrot. Add white dots using a Fine Tip Posca Paint Marker
Second Carrot: Apply dots of white acrylic paint using the smallest round sponge paint dauber (I purchased a set at Dollar Tree). After the paint dries, add white dots using a Fine Tip Posca Paint Marker
Third Carrot: Add 3 lines of “V” shapes to the carrot. Using the Fine Tip Posca Paint Marker, add dots and lines above the “V” shape lines.
Allow these to dry and move to the next step.
Picture Frame
Step One:
Either purchase a black frame or if not available, paint your frame black.
Step Two:
Take everything out of the frame and save the glass for another project.
You are going to use the backing of the frame (the one with the easel on the back).
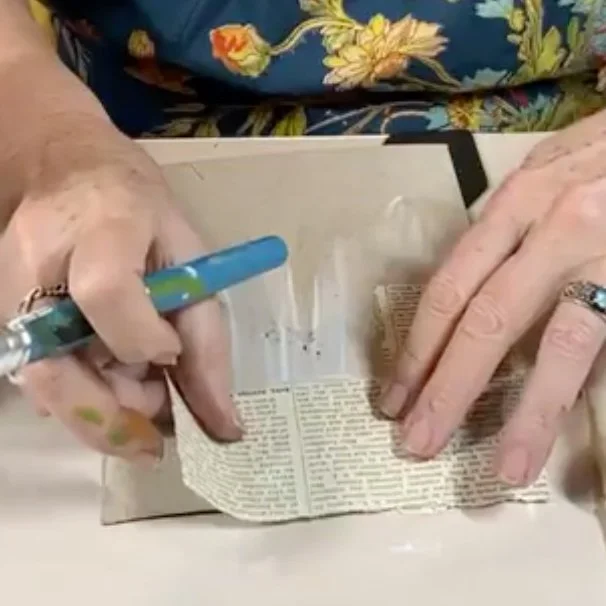
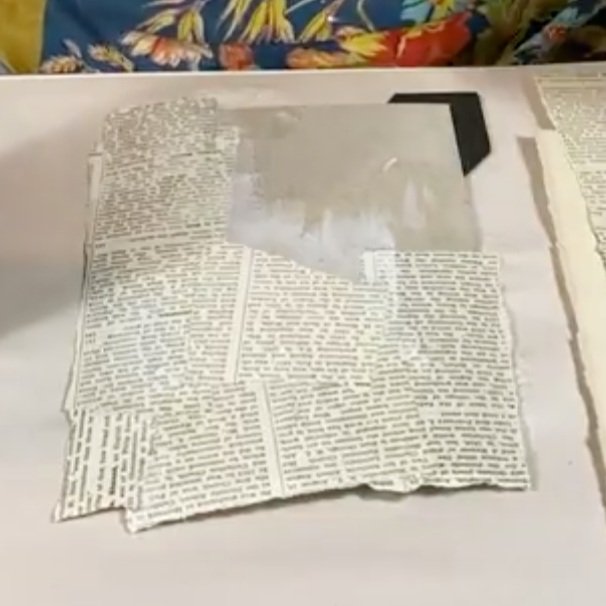
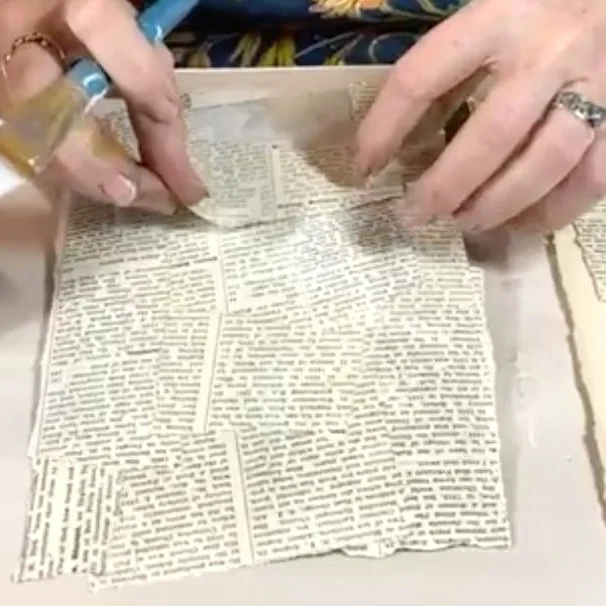
Tear your book paper into different size strips and collage the strips using Mod Podge. Completely cover the entire backing piece of the frame.
Be sure and add a layer on top to make sure that everything is glued down. Let this layer dry before moving to the next step.

Step Three:
If you want to add a distressed look to your book paper frame, use a texture stamp or bubble wrap (in either black or brown) to add dimension. (I used a Butterfly stamp from the Tim Holtz Butterfly Melange Stamp Set)
Step Four:
Glue your two Carrots to the frame, leaving space for the middle carrot.
Glue the third carrot on top of the two carrots.
Step Five
Add green moss to the top of the carrots using hot glue or adhesive of choice.
Step Six
Add an orange raffia bow to each carrot and attach with hot glue. (I used about 3-4 strands of raffia per bow)
Step Seven
Insert the finished frame back into the frame and proudly display your creation!

In just a few simple steps, you can bring a touch of whimsy and charm to your home with a DIY wooden carrot home decor frame. By painting and embellishing wooden carrots, creating a distressed book paper background, and assembling the final piece, you can create a unique and eye-catching decoration that will brighten up any room.
So why not give and let your creativity shine! Let this project be a reflection of your unique style.
